
Creating Free UBUNTU VPS server in oracle cloud
If you don't have Ubuntu VPS running, follow the link below and create the server. Also, You can watch the youtube video tutorial at the end of this post.
Create Free VPS in oracle cloud
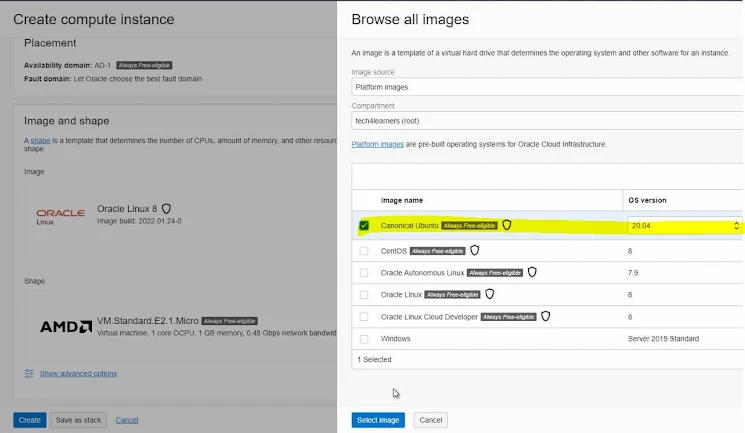
While creating the compute instance, we need to select Canonical Ubuntu in the Operating system image selection below.
Follow the below steps once you have the server up and running.
Update firewall port configurations for RDP
We need to allow connections via port 3389 in oracle cloud subnet configurations for remote desktop connection.
To do that, Click 'Public subnet' on the ubuntu instance details page and add a new Ingress rule.

Select Default security list.
Click the 'Add Ingress rules' button. Then, update the values as per the below image.

Now port 3389 is opened for remote desktop connections.
Update UBUNTU software packages
Connect the Ubuntu VPS server using any SSH client terminal with a private key.
Firstly, We need to update Ubuntu software packages.
Copy the below command and run it in the SSH terminal.
sudo apt-get update && sudo apt-get upgrade
Install and configure XRDP package in UBUNTU
Second step is to install the XRDP package, which will create a remote desktop connection in Ubuntu.
sudo apt install xrdp
We need to enable the xrdp once the installation is complete.
sudo systemctl enable xrdp
Next, We need to clear the default IP rule file, preventing the remote desktop connection.
sudo truncate -s 0 /etc/iptables/rules.v4
Now, We have completed the installation and configuration of Ubuntu XRDP.
Install UBUNTU MATE desktop GUI
Next, We will install mate desktop GUI for Ubuntu.
This desktop GUI is lightweight and one of the most popular desktop GUI for Ubuntu.
Copy and execute the below installation command.
sudo apt-get install mate-core mate-desktop-environment
Once installation is complete, set the mate desktop GUI as the default desktop environment for XRDP sessions.
Update default GUI for XRDP
sudo sed -i.bak '/fi/a #xrdp multiple users configuration \n mate-session \n' /etc/xrdp/startwm.sh
Set the password for the username ubuntu using the below command.
sudo passwd ubuntu
Enter the new password and confirm the password.

This password will be used to login in xrdp login page during remote desktop connection.
Now, all the installation steps and configurations are completed.
Restart the server using the below command.
sudo reboot
Wait for a few minutes and connect again using the SSH client.
If the connection is successful, then the server is up and running after the restart.
We can go ahead and connect the ubuntu cloud server using the windows remote desktop connection.
Open remote desktop connection application in windows and paste the IP address of ubuntu cloud VPS.
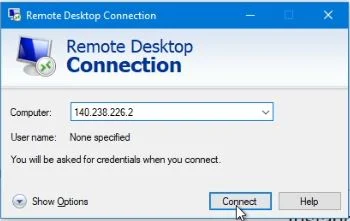
Click connect.
A warning message will be displayed.
You can accept the warning.
You can see XRDP login GUI in Ubuntu.
Enter the username and the password for Ubuntu and click OK.

Ubuntu mate desktop GUI will be displayed.

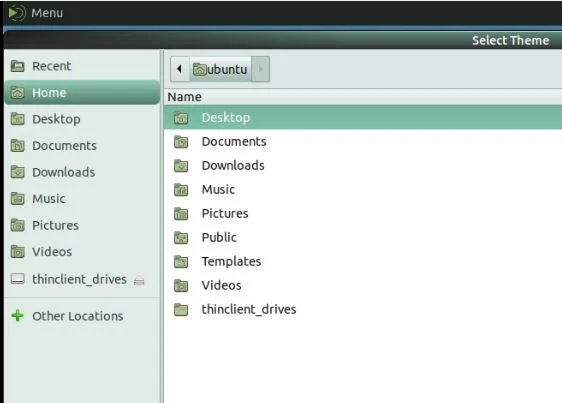
We have successfully connected the oracle cloud ubuntu server using the windows remote desktop connection.
I love to read stories about your experiences. They're very useful and interesting. I am excited to read the next posts. I'm so grateful for all that you've done. Keep plugging. Many viewers like me fancy your writing. Thank you for sharing precious information with us.Best linux vps server service provider.
ReplyDeleteMy vps is slow oracle free. What part i missed?
ReplyDeleteKnowledge-sharing, networking, and partnerships are common occurrences, fostering an environment where innovation is not just encouraged but expected.
ReplyDeleteSeattle Software Developers